Ant & Anise

Simple, elegant, healthy food and a fondness for gluten- and grain-free recipes

Navigation
  • Home
  • Recipes

Easy candied orange peel

candied orange peel coated in fine sugar

When December rolls around, you can count on me to first start thinking of what holiday treats I’ll be creating. Shortbread is a given, both sweet and savory. Fruitcake (yes!). Something chocolate, whether that’s a dark flourless cookie or almond roca bars, or – in rare years – chocolate fudge. And candied orange peel.

It’s one of my go-to holiday treats. For years it was grapefruit instead of orange, but I’ve come around to enjoying the orange peel more. So many reasons to love this recipe. It’s…

  • sweet but not heavy like so many holiday treats
  • easy to make
  • a fantastic gift from your kitchen
  • vegan, gluten free and nut free

So unless someone in your circles is staying away from sugar, it’s got a wide appeal.

Pun intended, Bob 😉

naval oranges for candied peel

Start by slicing the peel into even segments, then bring them to a boil in a saucepan a few times to remove any bitterness.

candied orange peel in pot after boiling

Simmer in a sugar syrup until the peel is tender and glistening, then move to a parchment-lined baking sheet to dry. Once the peel is almost dry, finish it off by rolling in superfine sugar.

candied orange peel drying on parchment

And that’s it. Simple. Amazingly tasty. And just in time for Christmas. Enjoy!

Print
Easy candied orange peel

Yield: 144 pieces

An easy treat for the holidays, and a welcome counterpoint to the heavy butter-laden cookies and tarts on your dessert tray. Naturally vegan and gluten free too.

Ingredients

  • 3 medium naval oranges
  • 1 cup granulated sugar
  • 1/2 cup water
  • 1/2 cup superfine (berry) sugar, for coating

Instructions

  1. Line two large baking trays with parchment paper and set aside.
  2. Wash and dry the oranges, and trim the ends off.
  3. With each orange, cut the peel through to the fruit in quarters. Gently separate the peel from the orange with your fingers. Reserve the orange for another use.
  4. You should now have 12 pieces of orange peel (four from each orange). Evenly cut each piece into 12 pieces.
  5. Place the peel in a medium saucepan and cover with cold water. Bring to a boil over medium heat. Boil one minute and drain. Return the peel to the saucepan and repeat this step three more times to remove the bitterness from the peel.
  6. Return the peel to the saucepan, cover with cold water, bring to a boil and simmer for 10 minutes. Drain the peel.
  7. Heat granulated sugar and water in the saucepan over medium heat, stirring until the sugar dissolves. Add the peel and boil gently in the syrup, stirring to ensure the syrup evenly coats the peel.
  8. When the syrup has mostly absorbed into the peel (10-15 minutes), remove from heat and place the peel in separate pieces on the parchment-lined baking sheets. Let dry, uncovered, at room temperature for 8 hours or overnight.
  9. After the peel has dried, toss a few pieces at a time in a small bowl with the superfine sugar, shaking any excess sugar off. Place sugar-coated peel on parchment-lined baking tray for a few hours.
  10. Transfer the peel to an airtight container.
3.1
Copyright 2011-2013 Ant & Anise

Roasted kabocha squash dip

roasted kabocha squash dip

Summer seems to have evaporated this year. It’s like I blinked and July was over, and the same happened with August. Now it’s back to school time. What the….??!

I’m always sad to see the end of summer, because it means that darker wetter weather will soon be taking over. But whether it’s summer or not, crunchy pre-dinner snacks rule around here. Mixed nuts, chips and salsa, chips and guacamole, chips and pico de gallo….you get the idea. 

And while I could hoover up chips and salsa any day, in the back of my mind I know it’s better to be eating more nutrient dense food: Enter roasted kabocha squash dip.

roasted kabocha squash dip

I first got to know kabocha squash a few years ago. Not normally a squash fan, I went head over heels for kabocha. It has a lovely sweet flavor (especially if you roast it) and a lighter texture compared with other squashes like butternut or acorn. Not so heavy, you know?

Another great thing about kabocha squash is you can eat the rind. Really! One way we’ve been enjoying kabocha is in a salad: Wilted kale, roasted kabocha (rind and all) and dried cranberry is a lovely salad that is good warm or cold, and — bonus — it keeps for several days in the fridge.

Now you will need to peel the rind for this dip. But you do so after it’s roasted, so it’s easy peasy. Some fresh lemon juice for brightness, ground cumin for earthy spice and a few tablespoons of tahini for creamy….Eve, what did you say….unctuousness?

All I can say is it’s so worth it to have a colorful, nutritious dip to welcome in the unofficial beginning of fall.

roasted kabocha squash dip


Print
Roasted Kabocha Squash Dip

Yield: About 2-1/2 cups

Ingredients

  • 1 medium kabocha squash, roasted and rind removed
  • Juice of 1 lemon
  • 2 tablespoons tahini
  • 1 teaspoon cumin
  • 1/4 teaspoon cayenne pepper
  • 5 tablespoons hot water
  • salt and freshly cracked pepper to taste

Instructions

  1. First, prepare the kabocha squash: Preheat oven to 400F and line a baking tray with foil. Cut the squash in half and remove the seeds, then slice the flesh into 1-inch thick wedges. Place wedges in a single layer on the baking sheet and drizzle with olive oil, then sprinkle salt and pepper over them. Roast for 20-25 minutes, or until the flesh is tender. Remove from oven and let cool, then slice off the rind. You should have about 14oz/400g of roasted squash.
  2. Place the roasted kabocha squash pieces in a food processor with the blade attachment, and pulse a few times.
  3. Add the lemon juice, tahini, cumin, cayenne pepper and hot water and puree until smooth.
  4. Scrape down the sides of the bowl with a spatula and ensure you have a uniformly smooth dip. If you would like it thinner, add a bit more hot water.
  5. Add salt and freshly cracked pepper to taste, and transfer to a serving bowl. Just before serving, drizzle with a tiny bit of olive oil and serve with colorful tortilla chips for dipping. Enjoy!
3.1
Copyright 2011-2013 Ant & Anise


Squash and apple soup

butternut squash apple soup final in pot

Ta da…..squash and apple soup!

It’s only taken a few months to get a new post out. I think we should start calling this an, ahem, occasional food blog. Since Eve and I started this, over 4 years ago now, life has seriously gotten in the way of time spent creating Ant & Anise — to peruse, experiment, measure, write down precise instructions, photograph and, at the end of all that, have something meaningful to say about a recipe.

And maybe that’s okay.

Because it does take time. Hours and hours for each post. But hours to explore new food ideas and recipes is something I’ve been short of, in a serious way, for what seems like forever.

Ahem, okay probably more like six or eight months, if I cut the hyperbole. Yep, real life has taken oven. Don’t quit your day job is ringing in my ears right about now.

Big sigh. Deep breath. Another deep breath.

So many things I would like to do with this blog, and so little time to squeeze it all in. Something has to give.

butternut squash apple soup CSA squash

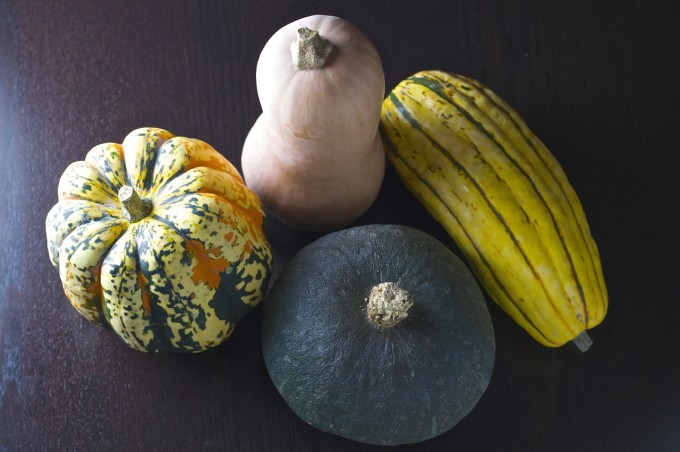
One thing that gave, a lot, was squash from the CSA. Yes, way back in the fall. It’s been that long.

At one point I had four of them on the kitchen counter, and they sat patiently for a few weeks before I decided that’s it, we’re doing a blitz on roasted squash around here. I think I was tired of moving them around to wipe the dust off the counter. I’m like that.

butternut squash apple soup squash cubes

Anyway, squash is one of those vegetables that I don’t didn’t rush out of my way to buy. Partly out of fear. It still kind of freaks me out. I’d be lying if I didn’t tell you I still have visions of having my chef’s knife taking a wrong turn and slicing my left hand open from wrist to fingertip.

Those rinds are hard suckers, no getting around it. Tackling four at once help to squash (sorry, bad pun) take away the fear, and I’m mostly over it now. In fact, I just bought a kabocha squash today, and it’s going on the chopping block this weekend.

The best advice I have for cutting into squash is to take it slow. Super slow. Have a decent cutting board and knife, keep your fingers safe, and don’t be in a rush. Once you’ve cut a squash in half, do a happy dance because the worst part is over. And the result will be so very, very rewarding.

butternut squash apple soup roasted squash in pot 2

The roasting blitz turned out to be a catalyst for a few new favorites around here. First up, squash and apple soup. It’s substantial for a blustery winter day yet not too heavy, creamy with the addition of coconut milk, and has a lovely depth of flavor from not only the apple, but from roasting the squash before it’s simmered with the onion, garlic and other soup ingredients.

Take a deep breath, and a sharp knife, cut into that squash rind, and don’t look back.

You can do this. And you’ll be very glad you did.

butternut squash apple soup in bowl

Print
Roasted Squash & Apple Soup

Roasting the squash before you add it to the soup adds a subtle depth of flavor. An easy, yet impressive, soup to make for guests or for when you need to warm up from the cold. Adapted from John Bishop's Butternut Squash and Apple Soup from his Simply Bishop's book.

Ingredients

  • 1 medium squash (butternut, kabocha), peeled and cut in 1-inch dice
  • 3 tablespoons olive oil, divided
  • 2 tablespoons butter
  • 1 medium onion, cut in 1/2-inch dice
  • 2 garlic cloves, minced
  • 2 teaspoons ground cumin
  • 2 teaspoons garam masala
  • 2 Fuji apples, cored, peeled and cut in 1/2-inch dice
  • 1/4 cup dry sherry
  • 4 cups chicken stock
  • 1 14-ounce can coconut milk
  • salt and pepper to taste
  • Garnish:
  • 1/2 Fuji apple
  • slices of cambozola cheese

Instructions

  1. Preheat oven to 375F. Place squash cubes on foil-lined baking sheet, drizzle with 1 tablespoon olive oil and, using your hands, toss the cubes to lightly coat with the oil. Place the baking sheet in the oven for 15-20 minutes or until browned.
  2. In a large soup pot, heat the remaining 2 tablespoons olive oil and the butter over medium heat. Add onion and garlic and saute until translucent, about 5 minutes. Add cumin, garam masala, and apple. Cook, stirring gently, for 2-3 minutes.
  3. Deglaze the pan with the sherry, and stir to loosen the browned bits on the bottom of the pot. Add stock, bring to a boil on medium-high heat and then turn the heat to low. Cover and simmer until the apple is softened, about 10 minutes.
  4. Add the roasted squash to the pot, stir in coconut milk, then remove from the stove and let cool for 15 minutes.
  5. In batches, puree the soup in a blender or food processor until smooth. Pour the soup into a soup pot, and season with salt and pepper.
  6. To serve, reheat gently over medium-low heat. Ladle soup into warmed bowls and top with julienned apple slices and a piece of cambozola.

Notes

If you like cambozola cheese (and who doesn't??), a lovely accompaniment to the soup is to serve crostini spread with cambozola cheese and thinly sliced apple. Heavenly....

3.1
Copyright 2011-2013 Ant & Anise


Cauliflower Cheese Bake

cauliflower cheese bake final plate1

It’s pretty much universal: Kids, of any age, like macaroni and cheese. Comfort food, pure and simple. My childhood memories of mac and cheese run to the boxed fluorescent orange Kraft Dinner variety, which I loved at the time.

Now my tastes run far, far away from packages of neon orange powdered cheese, and more to real foods. More as in 99.9% of the time. I also eat way less pasta than I used to. So now my go-to mac and cheese is actually cauliflower in a rich cheese sauce. Yep, cauliflower and crispy roasted leeks, covered in a sharp cheddar cheese sauce. I’m calling it cauliflower cheese bake, and it’s my new favorite comfort food.

Let’s get started.

First off, instead of steaming the cauliflower and leeks I roasted them with a drizzle of olive oil and some salt and pepper. Roasting teases out the natural sweetness in any vegetable. It also dries out the cauliflower slightly, so that it retains some crispness in its texture even when it’s cooked through.

cauliflower cheese bake cauliflower leeks

I turned the cauliflower florets and stirred the leeks up about halfway through roasting so they browned evenly, more or less. I also separated the leeks from the cauliflower on my baking sheet, just in case the leeks started to get too crispy before the cauliflower was done. (Turned out they were fine. I like the crispy bits anyway….) Here’s how they looked when the cauliflower was done:

cauliflower cheese bake cauliflower leeks roasted

The cauliflower and leeks roast for about 20 minutes, which is ample time to make the cheese sauce. It’s a cooking school classic, a béchamel (white sauce) with shredded sharp cheddar melted in. If you’ve never made béchamel, don’t despair! It is really, really easy to make, and this post from The Kitchn has step-by-step instructions with photos. I would have done more detailed instructions if I had more hands, or else a helper to take the photos…

A finishing touch is sprinkling some dry bread crumbs (or panko) for a crunchy texture contrast to all the cheesy cauliflower and leek goodness below. If you want a gluten-free — and seriously kid-friendly — version, crushed potato chips or shredded Parmesan cheese would work well.

Pop this back in the oven for 15-20 minutes, until the cheese sauce is bubbling around the edges, and voilà — your next favorite comfort food:

cauliflower cheese bake in pan

So why the talk about making a kid friendly dinner, you may be asking? Let me explain. I was inspired to create a dish because my sister-in-law Carol-Ann Hoyte, has just edited a collection of poems targeted to eight- to twelve-year olds. Dear Tomato: An International Crop of Food and Agriculture Poems, is all about the strong connection real food plays in our lives.

If you live in the Montréal area, Carol-Ann is having a book launch on April 26, 2015 (Sunday) from 2:00-4:00pm at Livres Babar in Pointe Claire.

If you’re in Austin, Texas, Dear Tomato will be sold at the American Horticultural Society’s 2015 National Children and Youth Garden Symposium, happening July 9-11, 2015.

If you live outside of these areas, there’s always online: Dear Tomato is available from U.S. independent booksellers, Canadian independent booksellers, and from Amazon.com, Amazon.ca, and Amazon.co.uk.

Also, selfishly, when I was thinking of healthy comfort food I thought of one kid in mind, my gorgeous nephew Thomas. He’ll be two years old in July and he is absolutely amazing. I’m sure he’ll love Auntie Kris’ cauliflower cheese bake when he’s a bit older.

Enjoy!

cauliflower cheese bake final plate


Print
Cauliflower Cheese Bake

Serving Size: 4

Comfort food made from scratch, inspired by Dear Tomato, a new collection of kids poetry. Roasting the cauliflower and leeks gives a sweet, rich flavor that pairs well with the tangy cheddar cheese sauce. The sauce is easily made gluten free by using a gluten-free flour mix in the sauce, and Parmesan cheese (or potato chips) for the topping.

Ingredients

    For the veggies:
  • 1 medium cauliflower (about 2 lb untrimmed/1 lb 6 oz trimmed), cut into florets
  • 2 small leeks, white and light green parts cut into 1/4 inch slices
  • 1 tablespoon olive oil
  • salt and pepper to taste
  • For the cheddar cheese sauce:
  • 2 tablespoons flour {*for gluten free, substitute gluten-free flour mix}
  • 2 tablespoons butter
  • 2 cups milk
  • 4 ounces sharp cheddar cheese, shredded
  • pinch nutmeg (optional)
  • salt and papper to taste
  • For topping:
  • 1/2 cup panko or bread crumbs {*for gluten free, substitute Parmesan cheese or crushed potato chips)

Instructions

  1. Preheat the oven to 425°F. Place cauliflower florets and sliced leeks on a large foil-lined baking sheet. Drizzle with olive oil, and use your hands to coat cauliflower and leeks evenly. Sprinkle with salt and pepper and place in the oven for 10 minutes.
  2. After 10 minutes, remove the baking sheet from the oven. Turn the cauliflower over and stir the leeks and place back in the oven for 8-10 minutes, or until the cauliflower can be pierced easily with the a fork. Reduce oven temperature to 375°F.
  3. For the cheese sauce:
  4. Heat the milk in a medium saucepan over low heat just until simmering, then turn off the heat.
  5. In a separate medium saucepan, melt the butter over medium-low heat. Add flour and whisk until there are no lumps. Add 1/2 cup of the hot milk and whisk until smooth.
  6. Continue adding the milk 1/2 cup at a time, whisking after each addition until smooth.
  7. Add the shredded cheese, stirring constantly until the cheese is melted in. Stir in nutmeg (if using) and salt and pepper to taste. Remove from heat.
  8. Place the roasted cauliflower in a shallow casserole dish in a single layer (I used an 8x8-inch square dish). Sprinkle the roasted leeks on top of the cauliflower, then pour the cheese sauce evenly over top. Sprinkle the panko (or Parmesan cheese, or crushed potato chips) over the casserole and place in the oven.
  9. Bake for 20 minutes, or until the cheese sauce is bubbling and the top is browned. (If the top isn't browned enough to your liking, crank your oven up to broil for a few minutes to finish it off.)
  10. Remove from oven and serve. Aaaahhhhh......comfort food.
3.1
Copyright 2011-2013 Ant & Anise


Tarragon Pesto

Tarragon Pesto Tarragon Leaves On Scale

Pesto is a small treasure. At least that’s how I think of it.

Isn’t it though? It’s a concentrated intensely flavorful sauce, similar to chimichurri, that lends itself to a variety of dishes. Tarragon pesto, like its more traditional sibling made with basil, can be spread on sandwiches, dobbed on top of soups, whisked into a vinaigrette or spread on grilled fish and meat. Top marks for versatility.

When I look inside my fridge and see a small container of tarragon pesto, like I did this morning, it makes me happy. It makes me feel like no matter how rushed I get during the work week, I can make a decent dinner in under 30 minutes.

Or I could pack a wickedly good lunch.

Tarragon Pesto Food Processor

I’ve been focused lately on what to bring for lunch during the work week. I haven’t been doing it yet, mind you. I’m still at the thinking stage, and dashing to the closest salad joint at lunchtime. New routines, settling in and figuring out what will work for actually bringing a lunch. Sigh. I’ll get there.

What I have realized is that unless I, ahem, up my weekend organization a notch or two, the quality of eating during the week has a high probability of spiraling downward into grabbing whatever’s fast, which isn’t typically what’s healthy.

I know it’s smart to make a big batch of something — a stew or soup or casserole — on the weekend and portion it out for a week of lunches. I may come around to this, but it’s not my regular habit. Perhaps it should be, though: There is science behind decision fatigue for lowering stress levels. And, as you’ve no doubt seen examples of Steve Jobs and Barack Obama wearing the same thing every day, reducing decisions could also point the way to being more productive. Hmmm…

Tarragon Pesto In Measuring Cup

That’s where tarragon pesto comes in. It’s a start to making it easier for me to put together a healthy lunch.

To start off, I used a spoonful of tarragon pesto as a base for a vinaigrette and had it as you see below, with seared tuna on top of some greens. Basically it’s a tarragon-y twist on salade niçoise, sans the egg, potato or anchovies.

Tarragon Pesto Seared Tuna Salad

Yes, this is rather fancy for a weekday lunch. In fact, it made a lovely dinner and took practically no time at all, once the pesto was made.

The best thing about it? I have leftovers to pack tomorrow for lunch. Wicked.


Print
Tarragon Pesto

Yield: 1/2 cup

A sauce as simple as it is versatile, tarragon pesto adds a lovely flavor à la française to sandwiches, salads or soups. Try using it as the base for your next vinaigrette or pasta sauce, too. Endless possibilities!

Ingredients

  • 1 cup loosely packed tarragon leaves (15g)
  • 2-1/2 cups loosely packed parsley (45g)
  • 1 clove garlic, finely chopped
  • 1/4 cup walnuts, coarsely chopped
  • 3 tablespoons fresh lemon juice
  • 2 tablespoons olive oil
  • kosher salt and fresh cracked pepper to taste

Instructions

  1. In the bowl of a food processor, place tarragon and parsley leaves together. Pulse a few times until the leaves are chopped well.
  2. Scrape down the sides of the bowl, then add the walnuts, lemon juice and olive oil. Whirl it around, scrape the bowl down again and taste it. Add salt and pepper to taste.
  3. You may prefer to add more lemon juice or olive oil -- if so, add it a teaspoon at a time until you reach the flavor you want. If you like the flavor but like a thinner consistency, add a few teaspoons of water.

Notes

TARRAGON VINAIGRETTE: To make the tarragon vinaigrette, I took a few spoonfuls of the pesto in a small bowl and whisked in 2 teaspoons of olive oil and 1 teaspoon of water. You could also add additional lemon juice if you like. You're basically aiming to get a thinned-out version of the pesto, so play around with adding whatever combination of olive oil/lemon juice/water you prefer until you arrive at the consistency you like.

3.1
Copyright 2011-2013 Ant & Anise

White Bean Chili with Prawns

white bean chili

I don’t think I’ve ever seen a chili recipe that has prawns in it. Am I stretching the boundaries of chili a tad here? Maybe.

But you’ll forgive me once you find that this recipe takes less than 30 minutes, yet delivers a full-on, soul-warming, healthy dinner. Just what you need after spending a few brisk hours in the garden, raking and bagging leaves, only to come back inside and realize that it’s your turn to make dinner too. Sound familiar?

I really felt like making a big, full-on batch of hearty chili, but it was already 6 o’clock by the time I’d bagged all the leaves for the day. I was getting hungry, and didn’t want to slip into being decidedly hangry.

With no time to dash to the store to pick up ingredients, I turned to the pantry instead and sized up what I did have: A tin of white kidney beans, some frozen prawns, a bunch of gorgeous rainbow chard along with an onion and some garlic. Hmm….I bet I could do something with this.

white bean chili in pan

So here’s what I was thinking: Use the white beans as a base, flavor them with cumin and chili powders, simmer briefly to blend the flavors and then toss in the chard and prawns to cook just before serving. That, plus a squeeze of fresh lime juice and sprinkle of cilantro, was my simple, lickety-split chili.

And wow, talk about flavorful. Punching about its weight I’d say, considering I only simmered it for just over 10 minutes.

This dish, with its elegant prawns and unassuming tinned beans, is kind of like tossing on a suit jacket to dress up your jeans; a study in contrasts. It might not impress your friends who are dazzled by the latest molecular gastronomy creations. But it’ll definitely impress your friends who know what good food is all about.

The leaves have almost all floated off from their branches for another season. A few more sessions of raking before fall firmly turns to winter. When I come in after clearing up the last leaves for the season, I’ll know just what to make.

white bean chili


Print
White Bean Chili with Prawns

Serving Size: 2

If you're craving the flavors of chili but don't have much time, white bean chili with prawns is the answer. Prawns add an elegant touch to lowly tinned beans flavored with chili and cumin, making this a dish fit to share with friends on a fall evening. Or to keep all to yourself.

Ingredients

  • 2 tablespoons olive oil
  • 1/2 medium sweet onion, chopped
  • 2 cloves garlic, chopped
  • 1 teaspoon chill powder
  • 1 teaspoon ground cumin
  • 1 teaspoon dried oregano leaves
  • 1 19-ounce tin white kidney beans, drained and rinsed
  • 1-1/4 cup chicken stock
  • 4 rainbow chard leaves, torn into 2-inch pieces
  • 20-24 peeled prawns
  • juice of 1/2 lime
  • kosher salt & fresh cracked pepper
  • optional garnish: fresh cilantro leaves, chopped

Instructions

  1. Heat the oil in a large saucepan over medium-low heat. Add the onion, garlic, chili powder, ground cumin and dried oregano leaves and saute for 3-4 minutes, stirring frequently, until the onion has softened. (If the mixture gets too dry before it has softened, reduce the heat or a few tablespoons of the chicken stock to prevent it from burning.)
  2. Add the drained kidney beans and chicken stock. Bring to a boil, then reduce heat to low and cover the pan. Let simmer for 10 minutes.
  3. After 10 minutes, remove the cover and season to taste with salt and pepper.
  4. Bring the heat up to medium-low, add the chard leaves and prawns, and cook for 3-4 minutes, or until the chard is wilted and the prawns are cooked through.
  5. Ladle into two bowls, and squeeze the lime juice over each one. Sprinkle with a pinch of chopped cilantro (if using) and serve.
3.1
Copyright 2011-2013 Ant & Anise

  • 1
  • 2
  • 3
  • …
  • 6
  • Next Page »
  • Facebook
  • Instagram
  • Pinterest
  • Twitter

About Us

We’re Eve and Kris, an aunt and a niece. We love food. And while we have a lot in common in our approach, we also have our differences. So why not hash it out in a blog? Ant and Anise is a conversation about food in our lives, past and present. We like real food that doesn't take hours to prepare, but has something unexpected about it. It helps if it's pretty, too.

Subscribe to Ant & Anise!

Search

recent posts

  • Easy candied orange peel
  • Roasted kabocha squash dip
  • Squash and apple soup
  • Micro-Batch Blackberry-Lime Jam
  • Cauliflower Cheese Bake
  • Tarragon Pesto
  • Cheer for ginger cookies
  • White Bean Chili with Prawns

© Copyright 2014 Ant and Anise · All Rights Reserved · Built On The Genesis Framework · Powered By Wordpress


Loading Comments...